Defining Style and the 60/30/10 Design Rule
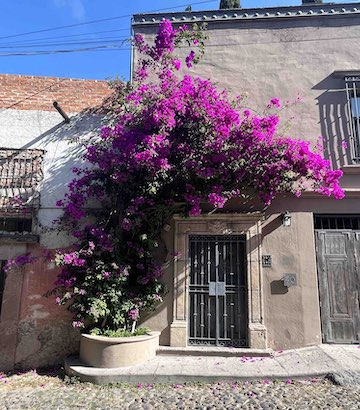
San Miguel’s bougainvillea & architecture

Sweeping views of the valley below
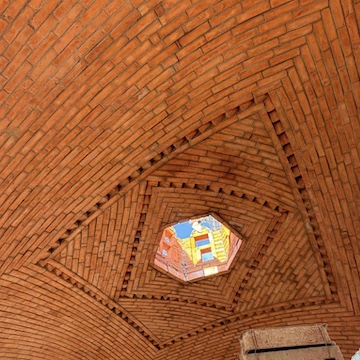
Boveda ceiling from inside our casa
This is my first house design and build. I refer to it as our “Mexican casa” since the build is in the high desert of Mexico. I am a Certified Colour Consultant in Interior Design but building a house is completely new territory. The key takeaways have been to start with a design style and follow the 60/30/10 colour rule in interior design.
When we started looking at properties in our town, San Miguel de Allende, we tended toward houses that needed renovations. In fact we told the realtor that we were “renovators” and not builders. That would all change the moment I stepped on this piece of land that wasn’t yet on the market. It was in a dream location outside of town, set against a mesa with sweeping views of the valley below
San Miguel de Allende is located in Mexico’s high desert. The Unesco-designated heritage town sits above six thousand feet and is in the interior of Mexico, approximately four hours north of Mexico City. The architecture is stunning with tall stone walls featuring swaths of bougainvillea vines, magical garden-filled courtyards and buildings painted in classic burnt oranges, browns and yellows.
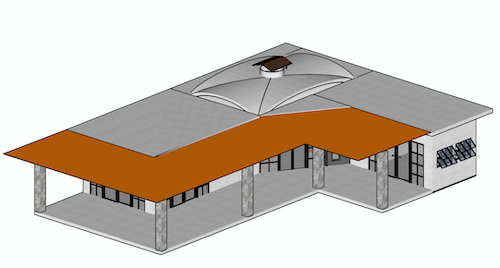
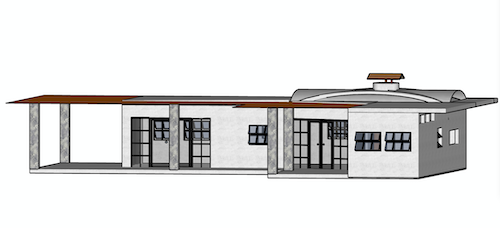
While the key design elements defining San Miguel’s architecture are extraordinary, our home design veered in another direction. We had 500 meters square of land to work with and incredible views in all directions. We decided that our primary views would be of the sweeping landscapes of the valley below and felt that an L-shaped house design with lots of windows would best capture this vista. Typically the best views in town are from a rooftop because buildings are constructed in rows in the town of San Miguel. We didn’t have to worry about a neighbour building higher than us because our property was on a slope. This also allowed us to build only one story with minimal stairs. We still have a pergola on the roof but the views can be enjoyed from anywhere in the casa.
A simplistic design was also important to us. We wanted the house to be livable within a year and not be an ongoing project like our 5-year renovation in Canada. I had held images of a raw, industrial style in my imagination for quite some time and this was what led the design of our Mexican casa. Stating that it “led” is important because while we captured elements of an industrial theme, this changed during the build. I feel that an overall “design style” is important as it helps determine your color scheme.
I began to gather reference photos that would help create a house design in the 3D modelling program, Sketchup. This process of gathering photos and detailing the design elements for the builder really helped me to stick to the 60/30/10 rule of color. This rule states that 60% of your color should be your primary color, 30% is dedicated to a secondary color and 10% to an accent color. I’m careful with the interpretation of this rule as I know from experience that it can feel restrictive. It is meant to help guide us in the proportion we assign to each color group. For every color, you can incorporate shades of that color to add more variety and interest. For example, in our Mexican Casa our color breakdown is: 60% Greys, 30% natural wood (i.e. we used a light stain) and the remainder: shades of orange. The shades of orange show up in our clay brick Boveda ceiling, bright orange roof tiles and in a rust-colored sofa (and hopefully terra cotta planters on the porch after we move in!).
Thanks for reading Part 1 of our Mexican House Build!
Sketchup designs and layouts for the builder
This next section is for techie design geeks. I was so excited for this project that I began to work on the build designs while driving home to Canada from Mexico in the spring of 2024. I had learned how to use the 3D modelling program, Sketchup while studying interior design in 2021. The L’-shape was to maximize views of the valley. It also allowed us to build a beautiful desert garden in our front yard and enjoy those vistas from all rooms in the house. Mexico is about indoor/outdoor living so the wrap-around porch is quite big and meant for our dining table, hot tub and lounge chairs.
We played with several layouts for the bedrooms, bathrooms, kitchen etc but in the end, a lot of these decisions come down to functional use of space. For example:
- We wanted the guest bedroom far away from our Master bedroom for privacy
- We wanted a bathroom with shower attached to each bedroom
- We wanted big closets in the two hallways to offer lots of storage options
- We cook at home a fair bit so we measured our counter and cupboard space at our home in Canada and replicated this. Similarly, we wanted a kitchen island as we eat breakfast and lunch at our island in Canada and expect to do the same in our Mexican casa. We also wanted the kitchen island to be a showpiece. In the next section you’ll see a reference photo of a bar I fell in love with and wanted to recreate for our island.
- We wanted an open concept room for the kitchen and living room to give the illusion of a grand space (even though our spaces are quite conservative in size). The living room is big enough for an entertainment unit and a large sofa. More about the sofa in a future entry but it’s big enough for all our animals to chill with us in the evenings.
- We looked at the grand space as a communal meeting area for ourselves and guests. The idea was that we can each have our own “wing” to retreat to when we wanted time alone (yes we are expecting a lot of visitors and yes, I love my alone time!)
Please click on the layout diagrams below to zoom in. Sorry but they are in Spanish for our builder!
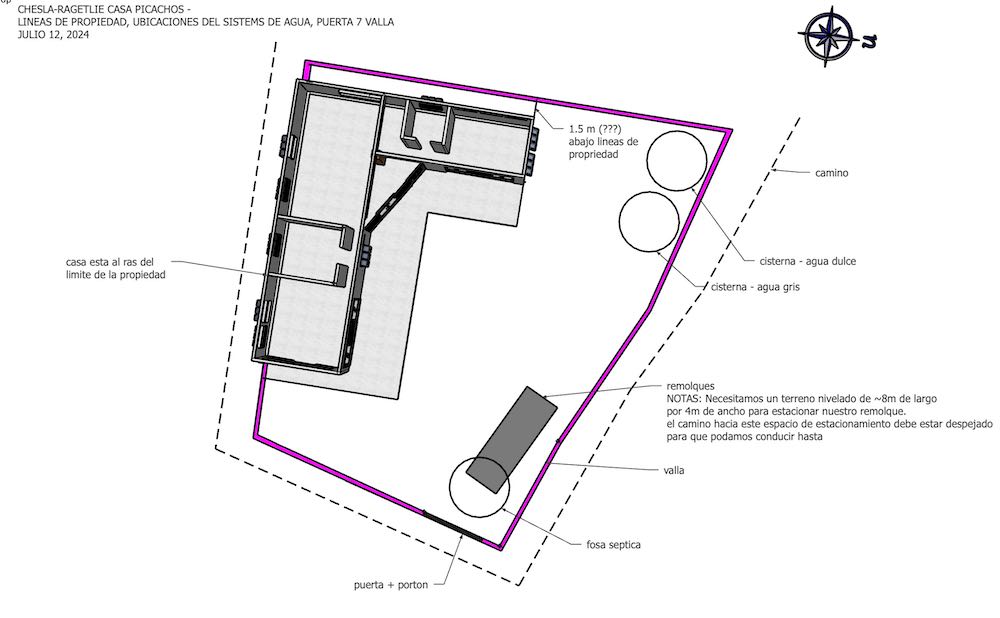
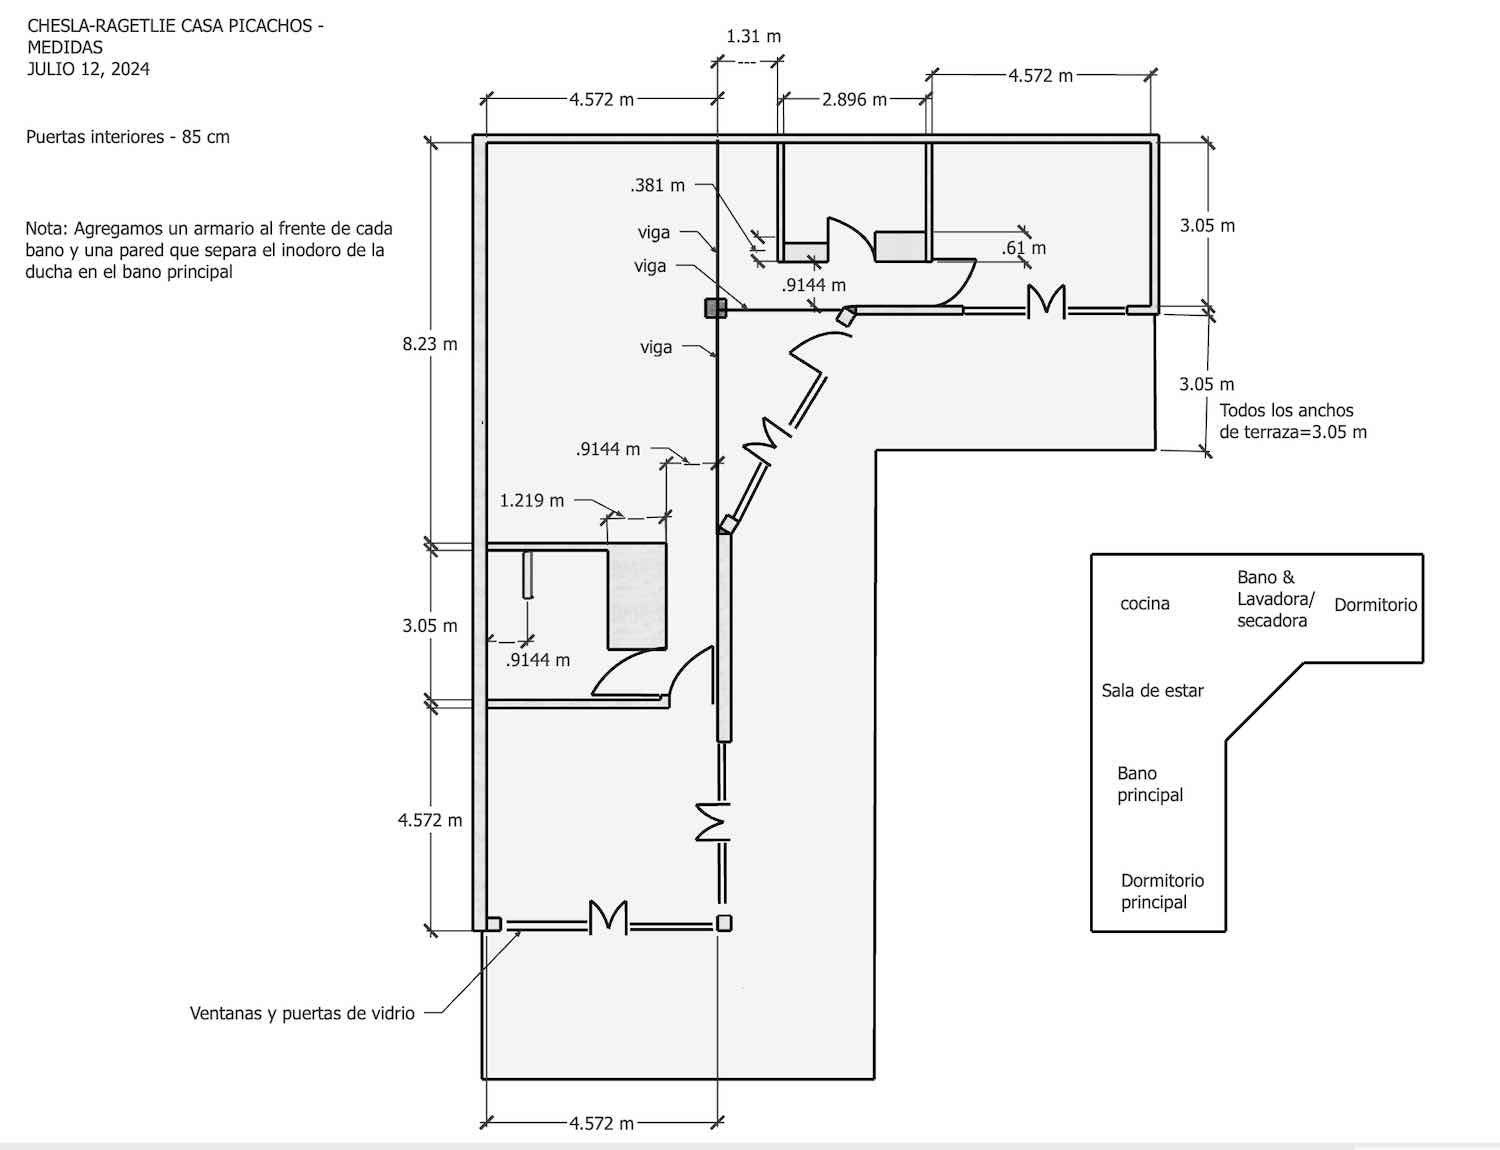
Up Next: Reference photos that inspired our design